How to install Zipscreen Blinds in a recess
3 – Install Headbox
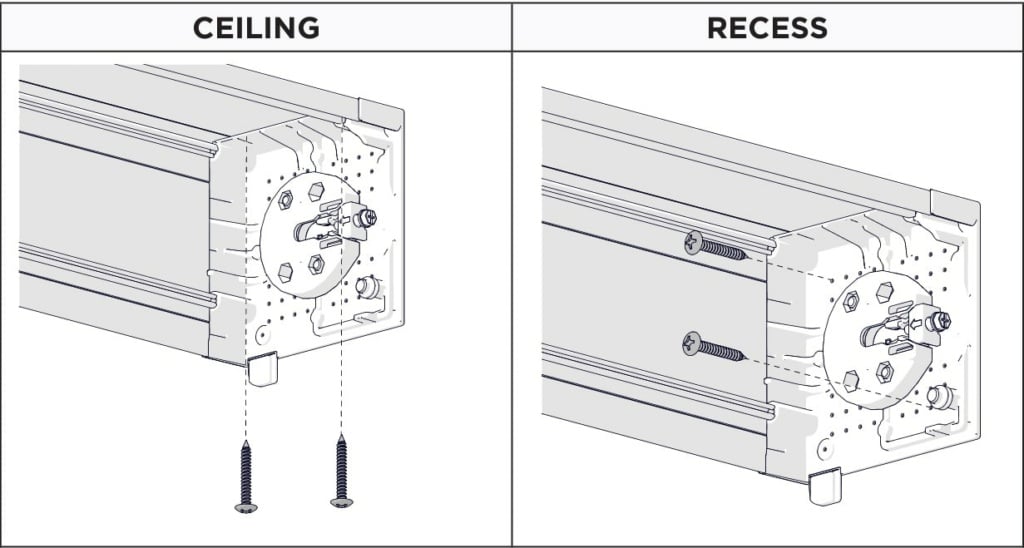
- Pre drill fixing locations as shown below for your type of installation, ceiling fix or recess fix. Please note. Fixings/Screws are not supplied and need to be sourced for your type of installation accordingly, brick/timber/concrete etc. Please only use external rated fixings only.
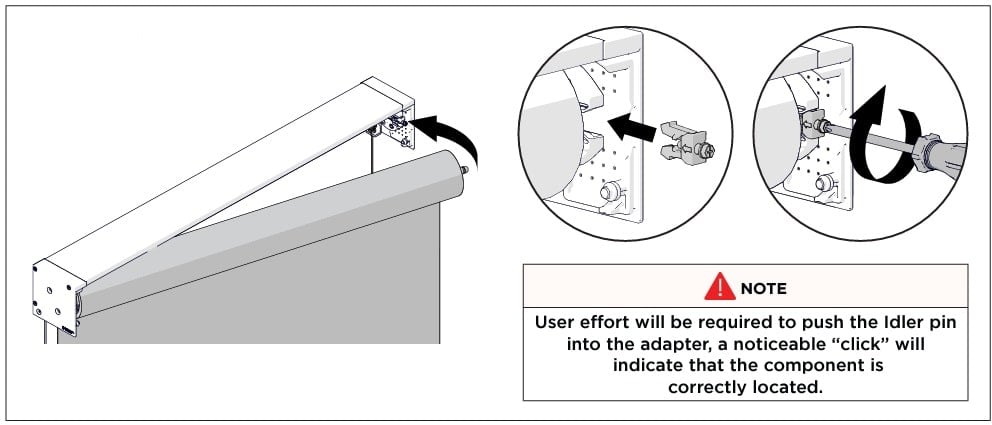
- Install your headbox assembly level without blind installed.
NOTE: If your Zipscreen is motorised please pre drill a 22mm diamter hole for supplied rubber cable grommet. Location will depend where your electrician required the power to be run from.
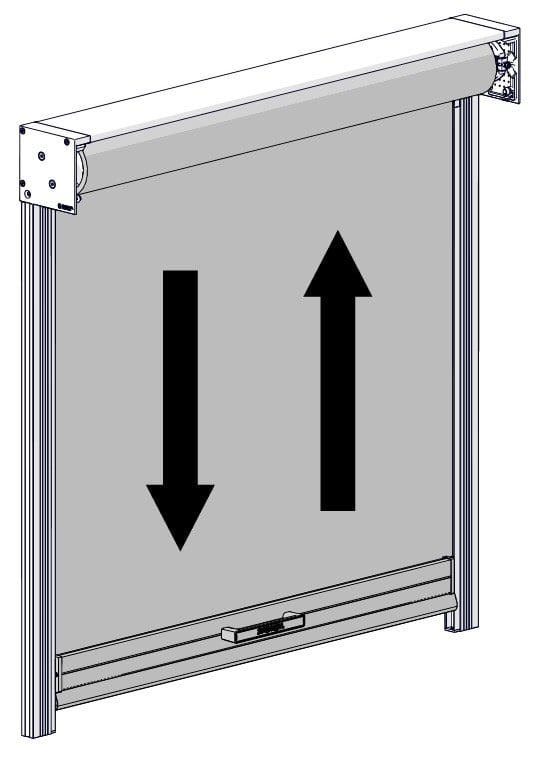
6 – Operate/Test Blind without side channels
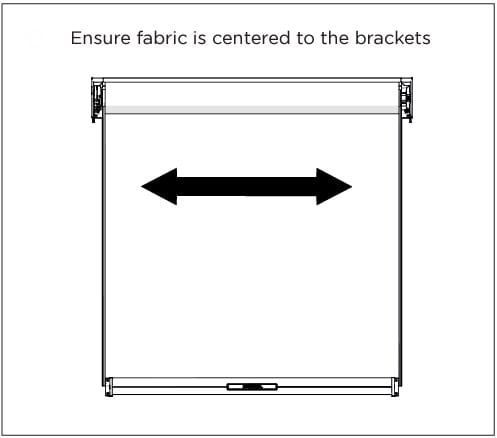
Operate blind up and down to ensure the fabric is settled and centred between the recess before you fix off the side U-Mounting rails. When blind is lowered to ground level or just below you can slide blind left or right on the spline/tube to assist with centring.
Tip: Operate the blind up and down several times and adjust left or right on spline to ensure the blind is at a centred position.
For Spring operation click here for a detailed guide.
For Motorised operation please click here for a detailed guide.
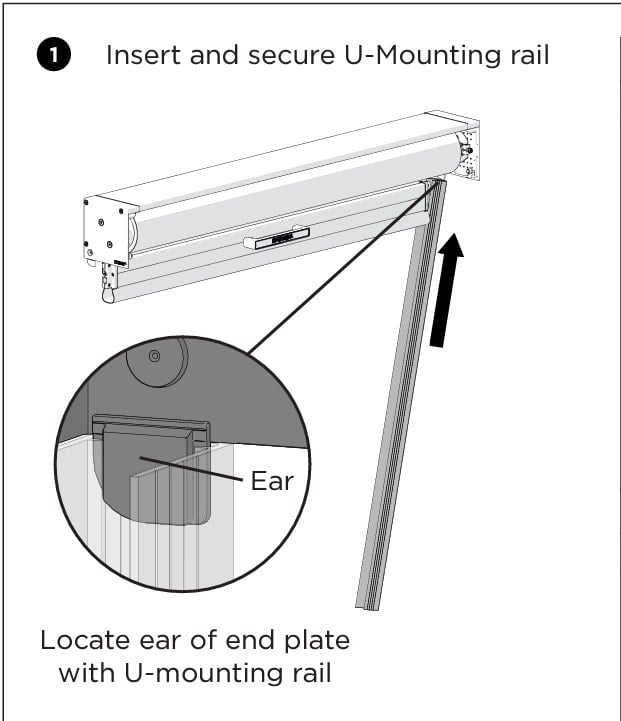
7 – Install side U-Mounting rails
TIP: Take note of guide lines on rails. These are used when fixing inner rail to U-Mounting rail.
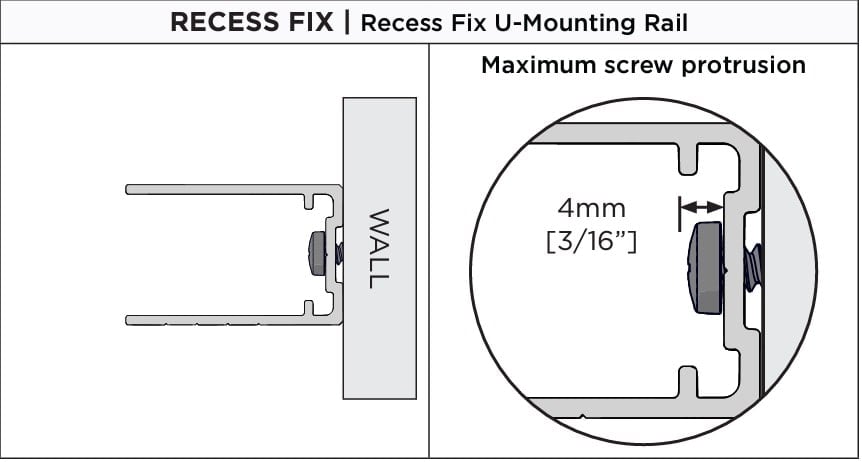
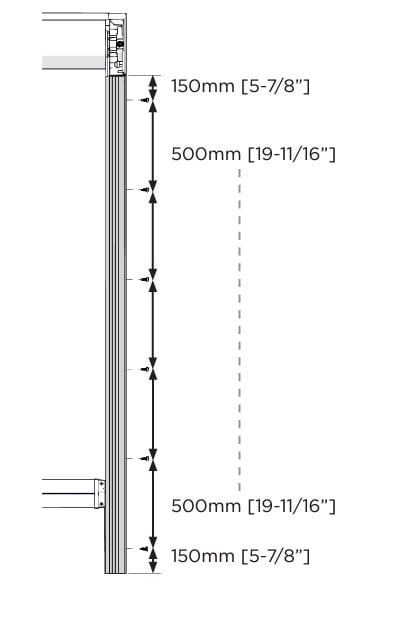
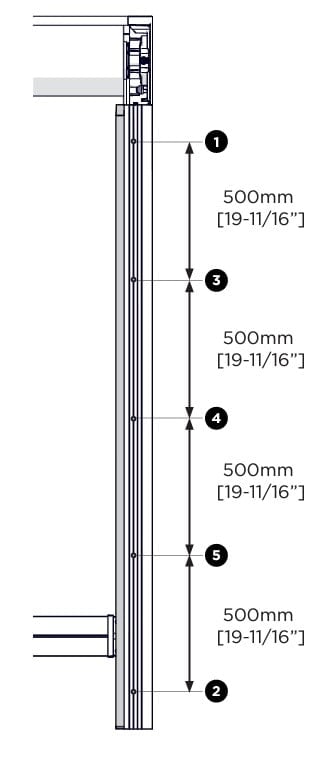
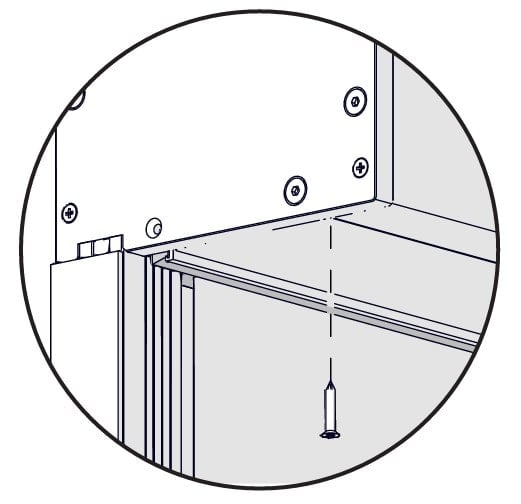
- Pre drill fixing locations as shown in the next diagram and install U-Mounting rails to your opening. Start at 150mm from either end. Please note. Fixings/Screws are not supplied and need to be sourced for your type of installation accordingly, brick/timber/concrete etc. Please only use external rated fixings only.
- Ensure the distance between each fix point does not exceed 500mm.
Its not unusual for your opening to have a different height on opposite side. Side U-Mounting rail and inner channels can be cut down accordingly.
8 – Insert inner Rails
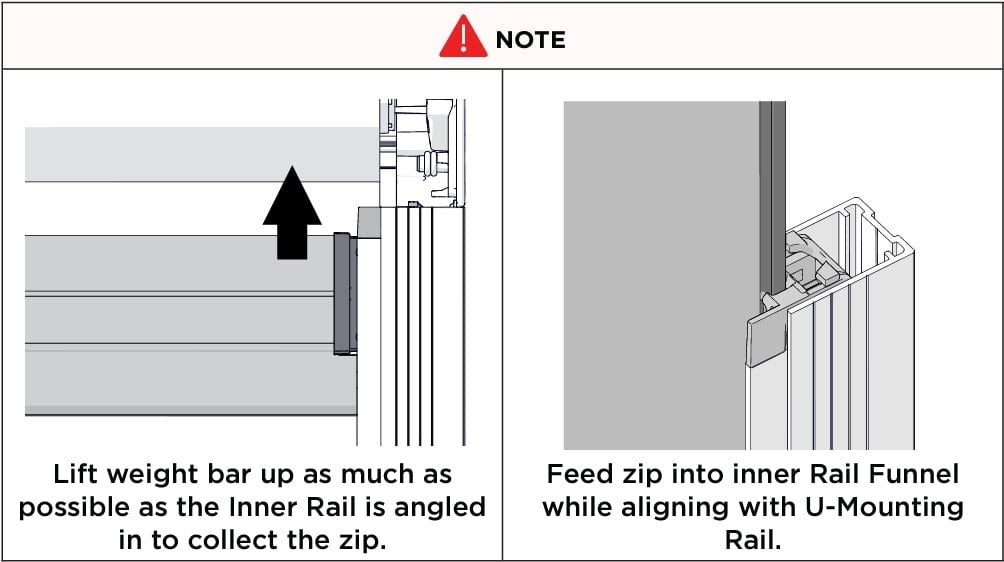
- Make sure the blind is operated to its upmost position so you can feed the zip on the sides of the blind into the inner rail funnels on either end.
- Lower baserail of blind and slide the top funnel clips accross so the zips cannot pop out of the top of the funnel.
- With the inner rails installed on both sides loosely operate the blind up and down a few times so the inner rails settle into a nice position. Ensure you do not operate the blind too high as the blind may pull the inner rails upward and out of place or if the funnel clips are not in place the blind will pop out of the funnel.
- Operate the blinds baserail to approximitely 150mm below the headbox.
9 – Fix off Inner Rails to U-Mounting rails
We recommend using Aluminium Rivets to avoid possible rust although Self-Drilling 8Gx1/2″ external rated Pan screws can also be used in this section.
- Using the same spacing method as fixing U-Mounting Rails (150mm from ends then no fixing spacing larger than 500mm), fix off inner rails to U-Mounting rails.
- Start from the top approximitely 150mm down.
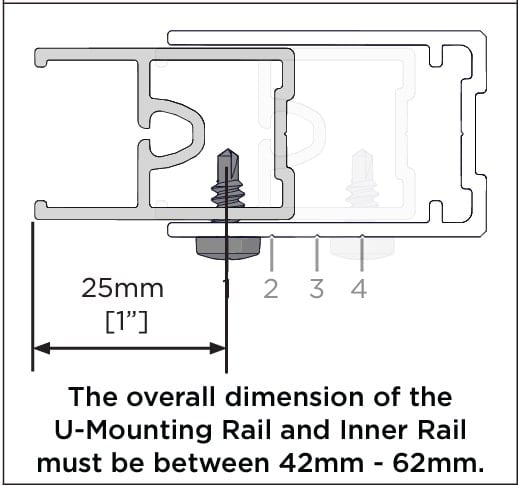
- Fix both sides while blind is at this interval (Take note to pre drill and fix at 25mm from inside edge of inner rail to ensure you are fixing in the centre of the innter rail extrusion.
- Lower the blinds baserail to your next fixing interval as stated above no more than 500mm apart
- Repeat step 4 until you reach the last fixing approximitely 150mm from the floor
Take note of guidelines 1 to 4 on extrusion. It is possible to not use the same guideline all the way top to bottom if your opening is not square (Go with the blind baserail and rivet/fix where it lies always measuring 25mm from inner rail edge to fix point). Please do not pull tension on inner rail when fixing off as this will cause the blind to get stuck during operation.
10 – Install hood cover and secure
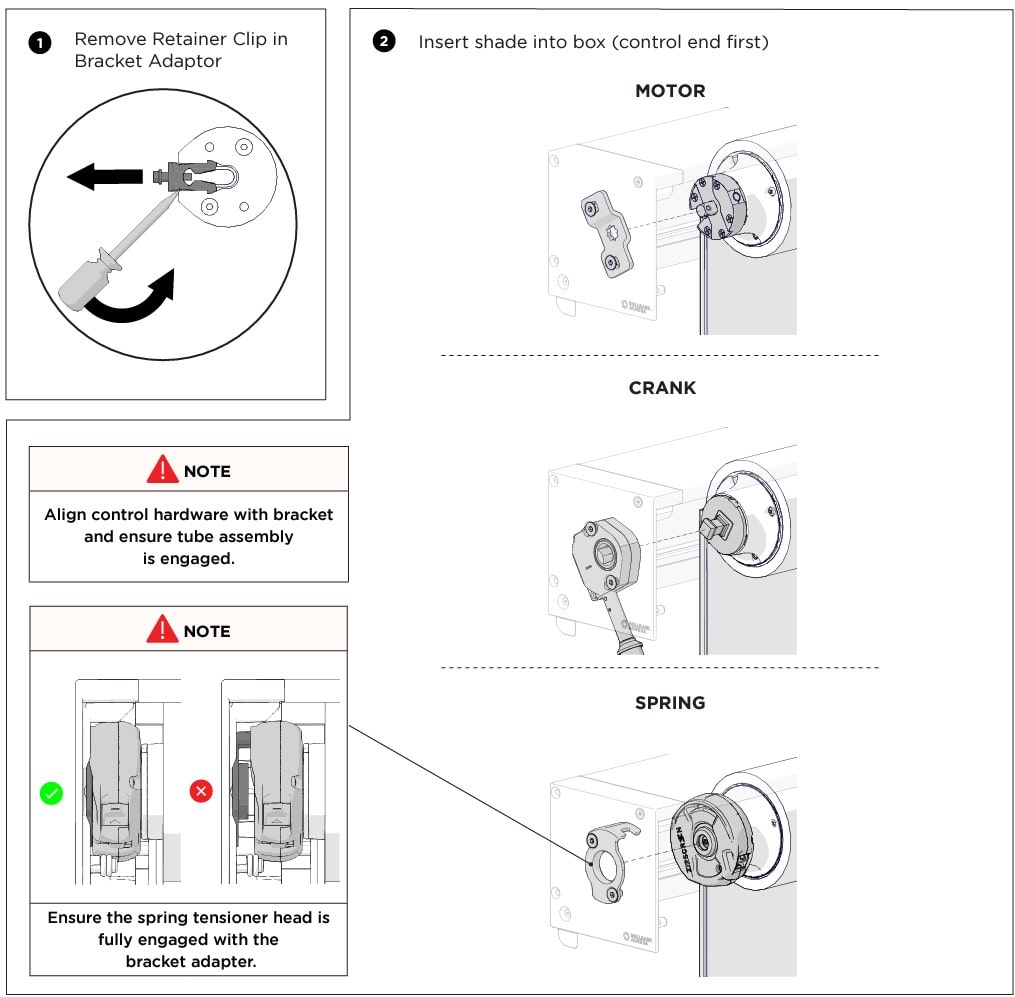
For spring operated Blinds please ensure tension settings are ok before securing headbox cover.
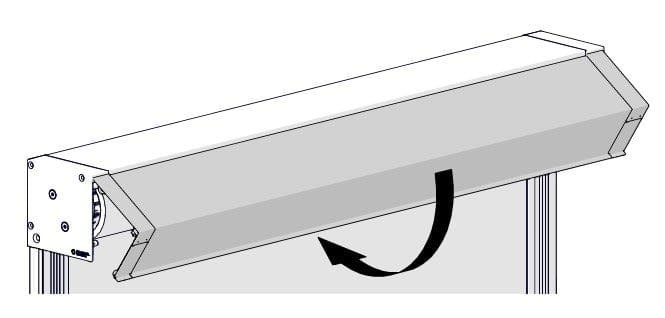
- Install headbox cover
- Rivet/fix headbox cover to secure for high winds As shown below the fix point needs to be 7-8mm from the end of the extrusion.
IMPORTANT! If you fail to secure the headbox cover it can be very dangerous if the blind becomes stuck it can unravel and push the headbox cover off or during high winds is a possibility
11 – Congratulations you are done!
Operate blind up and down to ensure operation is smooth.
- For motorised blinds you may need to re program the bottom limit holding stop and down, jogging up and down to desired location and holding stop and down again.
This is a Guide only and is intended to provide general information. Users of this Guide who are not familiar with any terms are encouraged to seek a registered tradesman

